Monstera plants are iconic interior decor choices, famous for their lush green split leaves and vibrant tropical vibe. Learning how to **propagate monsteras** allows houseplant enthusiasts to easily multiply their collection without spending extra money at the garden center. Whether you want to share plant cuttings with friends or make your original parent plant look fuller, this step-by-step guide covers everything you need to know for ultimate success.
Why You Should Learn to Propagate Monsteras
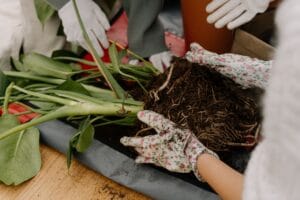
Propagating tropical plants is one of the most rewarding parts of indoor gardening. It gives you complete control over your plant collection while saving money on expensive, mature specimens.
When you propagate monsteras, you can also rejuvenate older plants that have become leggy or outgrown their indoor space. Pruning encourages fresh new growth on the mother plant, keeping your green decor looking full and healthy year-round.
For more helpful guides on plant maintenance and stem pruning, check out our resource propagate monsteras.
Essential Tools You Need Before Starting
Before making your first cut, gather all the necessary supplies to ensure a smooth operation. Using clean tools prevents harmful bacteria from invading the fresh cut on your plant stem.
Here is what you will need for this project:
– Sharp, sterilized pruning shears or heavy-duty scissors
– Clear glass jars, bottles, or vases (for water propagation)
– Fresh, well-draining potting soil rich in perlite (for soil propagation)
– Liquid indoor plant food or organic rooting hormone (optional)
7 Easy Steps to Propagate Monsteras
Follow these straightforward steps to turn a single stem cutting into a thriving, independent houseplant.
Step 1: Identify a Healthy Node and Aerial Root
Examine your parent plant carefully to find a healthy stem with at least one or two fully developed leaves. Look closely for a node, which is the raised, dark brown bump or junction on the stem where new roots emerge.
An ideal cutting includes a visible node and preferably a small aerial root attached. Without a node, a leaf cutting cannot produce new root structures or grow fresh foliage.
Step 2: Make a Clean, Angular Cut
Use your sanitized shears to cut about one to two inches below the chosen node. Make a swift, clean cut at a 45-degree angle to maximize the surface area for water absorption.
Avoid tearing or crushing the plant stem, as jagged wounds invite fungal rot. Wipe down your cutting blade with rubbing alcohol before moving on to another plant.
Step 3: Prepare Your Propagation Medium
You can choose to **propagate monsteras** in clean water or plant them directly into moist potting soil. Water propagation is highly recommended for beginners because it allows you to observe the root system developing day by day.
If using water, place the cut stem into a clear glass jar filled with room-temperature tap or filtered water. Ensure the node stays completely submerged while keeping the leaves safely above the rim.
Step 4: Place the Cutting in Optimal Light and Warmth
Position your glass container or potted cutting in a warm spot that receives abundant, bright indirect sunlight. Avoid placing fragile cuttings in harsh, direct rays, which can scorch tender leaves and overheat your water container.
Maintaining a warm ambient temperature between 70°F and 80°F speeds up root development significantly. According to botanical research from , warm temperatures greatly stimulate cellular division in tropical plant cuttings.
Step 5: Monitor Root Growth and Refresh Water
If you selected water propagation, change the water every three to five days to prevent algae buildup and replenish oxygen levels. Clean water prevents stem rot and provides your cut stem with the best growing environment.
Within two to four weeks, you will notice tiny white roots sprouting from the node. Allow these roots to grow at least two to three inches long before transplanting the cutting into soil.
Step 6: Pot Up Your New Monstera Cutting
Once the roots are strong and branching, prepare a small pot filled with a well-draining soil mix. Gently plant your cutting, ensuring the newly formed roots are completely buried and supported by soil.
Water the freshly potted cutting thoroughly until