Keeping your indoor jungle vibrant and healthy requires more than just regular watering and the right soil. If you want your houseplants to photosynthesize efficiently, you must regularly clean leaves to remove dust, grime, and pests. Over time, a thick layer of household dust settles on the foliage, acting like a physical barrier that blocks sunlight and slows down growth. When you clean leaves on a routine schedule, your plants remain beautiful, active, and highly resilient against common household plant ailments.
While watering and fertilizing are often at the forefront of plant care, leaf hygiene is a frequently overlooked aspect of successful indoor gardening. Dust is not just an aesthetic issue; it directly impacts the physiological functions of your plants. When you take the time to wipe down or wash your foliage, you open up microscopic pores, allowing your greenery to breathe and absorb light at maximum capacity. This comprehensive guide will walk you through the science of leaf hygiene, the best methods for different plant types, essential tools, seasonal care tips, and how to avoid common cleaning mistakes.
The Science Behind Why You Need to Clean Leaves
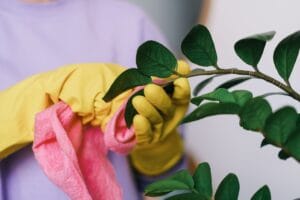
To understand why clean foliage is so critical, it helps to look at how plants function on a cellular level. Leaves are the primary solar panels of a plant. They contain chlorophyll, which captures light energy to convert carbon dioxide and water into glucose—the plant’s primary food source. When dust accumulates on the foliage surface, it reflects and absorbs light before it can reach the chloroplasts. This reduces the rate of photosynthesis, leading to slower growth, smaller leaves, and a generally weak plant structure. When you clean leaves regularly, you maximize light absorption and maintain strong metabolic energy.
Furthermore, leaves are covered in microscopic pores called stomata, which are primarily located on the undersides but can also be found on the upper surfaces of many species. Stomata regulate gas exchange, allowing the plant to take in carbon dioxide and release oxygen and water vapor through transpiration. When dust, grease, and household pollutants clog these stomata, respiration is severely compromised. If you fail to clean leaves, the trapped particles cause chronic stress, making your greenery far more susceptible to fungal diseases and insect infestations.
According to expert horticultural advice from the Royal Horticultural Society, clean foliage is essential for preventing pest infestations and optimizing light absorption. Regular cleaning sessions also give you an excellent opportunity to inspect your collection closely. Every time you clean leaves, you are much more likely to spot early signs of spider mites, mealybugs, scale, or thrips, allowing you to treat the issue before it turns into a full-blown infestation across your living space.
How Often Should You Clean Leaves on Houseplants?
There is no single rigid timeline for how often you should clean leaves, as it largely depends on your specific home environment. Homes with pets, active HVAC heating systems, wood-burning stoves, or those located near busy roadways tend to accumulate dust much faster than quieter, highly filtered spaces. However, a good general rule of thumb is to inspect your plants every two to four weeks.
If you wonder when to clean leaves, a simple “finger test” offers instant clarity. Gently run your index finger across a few representative leaves. If you can see a clear path left in the surface dust, or if your finger comes away dirty, your plant is overdue for a thorough wash. Additionally, if the foliage looks dull, matte, or has lost its rich luster, taking a few minutes to clean leaves will immediately restore its natural shine and aesthetic appeal.
Seasonal changes also play an important role in how frequently you need to clean leaves. During the active spring and summer growing seasons, plants require all the light energy they can harvest to fuel new stems and foliage, making routine dusting essential. In winter, when daylight hours are significantly shorter and weaker, taking time to clean leaves becomes even more valuable to help your indoor garden maximize whatever low ambient light is available.
5 Safe and Easy Ways to Clean Plant Leaves
Different plant species possess unique leaf structures, meaning a technique that works perfectly for a sturdy Monstera might damage a delicate fern or a velvety African Violet. When you prepare to clean leaves across your collection, matching your cleaning method to the texture and thickness of the foliage ensures optimal safety.
1. The Damp Microfiber Cloth Method
This is the classic, most reliable technique when you need to clean leaves that are large, smooth, and broad. It allows you to wipe each leaf individually while inspecting both the upper and lower surfaces for potential pests or fungal spots.
Best for: Monstera deliciosa, Fiddle Leaf Figs, Rubber Trees, Snake Plants, and Peace Lilies.
- Step 1: Prepare a bowl of lukewarm water. Avoid hot or cold water, as extreme temperature swings can shock the root system and trigger leaf spotting.
- Step 2: Dip a soft microfiber cloth, cotton rag, or clean sponge into the water and wring it out thoroughly so it remains damp rather than dripping wet.
- Step 3: Support the underside of the leaf with one hand to prevent bending, cracking, or snapping the stem.
- Step 4: Gently wipe the leaf from the base near the stem outward toward the tip.
- Step 5: Rinse the cloth frequently so you do not transfer dust particles between foliage. Remember to clean leaves on their undersides where pests frequently construct webs or hide.
2. The Gentle Shower Method
When you have plants with dozens of small, dense leaves, wiping each one individually is nearly impossible. Giving your plants a gentle shower is an efficient way to clean leaves across the entire plant at once while simultaneously hydrating the potting medium.
Best for: Pothos, English Ivy, Boston Ferns, Spider Plants, and Philodendrons.
- Step 1: Move your plants into the bathtub, shower enclosure, or deep kitchen sink.
- Step 2: Adjust the water temperature to lukewarm and set the spray nozzle to a soft, misting pressure. High pressure can tear delicate foliage or strip potting soil from the container.
- Step 3: Spray the plant evenly, allowing the gentle cascade to clean leaves on both top and bottom surfaces.
- Step 4: Let the plants sit and drain thoroughly in the tub before returning them to decorative pots. Preventing excess water accumulation in saucers helps shield your roots from fungal rot.
3. The Soft-Bristled Brush Method
Some plants feature textured foliage covered in microscopic trichomes or fine hairs. Using a wet cloth on these textures can mat down the delicate hairs or trap moisture against the leaf tissue, encouraging fungal infections. A dry brush is the safest way to clean leaves with soft, fuzzy coatings.
Best for: African Violets, Begonias, and soft-textured succulents.
- Step 1: Select a clean, soft-bristled paintbrush, makeup brush, or soft detailing brush.
- Step 2: Hold the leaf firmly yet gently from beneath using your fingers.
- Step 3: Starting at the stem base, brush lightly toward the tip to sweep away dust and dry debris.
- Step 4: Tap the brush periodically on a dry towel to dislodge accumulated particles as you clean leaves across the plant.
4. The Mild Soapy Water Wash
In kitchen environments or high-traffic areas, household dust mixes with airborne cooking oils and grease, forming a sticky film on foliage. Plain water may not dissolve this greasy coating easily. Using a mild soap solution helps clean leaves coated in stubborn residue without harming the protective cuticle layer.
Best for: Sturdy plants with heavy dust, grease, or sticky sap buildup.
- Step 1: Mix a few drops of pure liquid castile soap or organic insecticidal soap into one quart of lukewarm water. Avoid dish detergents or harsh household degreasers.
- Step 2: Dampen a soft cloth or spray the mild solution directly onto the foliage.
- Step 3: Gently wipe away grease, sticky sap, or environmental grime.
- Step 4: Rinse thoroughly with clean lukewarm water afterwards. It is vital to clean leaves of all soap residue so stomata remain open and clear.
5. The Dipping Method
For small, compact potted plants or hanging varieties with intricate foliage, dunking the top of the plant into a basin of water offers a rapid cleaning solution. Dipping is a swift technique to clean leaves on delicate species that cannot withstand heavy handling.
Best for: Small succulents, air plants, trailing Peperomias, and compact ivies.
- Step 1: Fill a clean bucket or bowl with room-temperature water.
- Step 2: Wrap the pot opening with plastic wrap or foil to hold the soil securely in place.
- Step 3: Invert the plant carefully, holding the main stem base between your fingers, and submerge the foliage underwater.
- Step 4: Swish the plant gently back and forth for 5 to 10 seconds to loosen surface dust.
- Step 5: Lift the plant, shake off excess droplets, unwrap the container, and allow the foliage to dry in a bright area with good airflow.
Tailoring Your Routine to Specific Plant Types
Customizing your approach based on plant categories yields significantly better results. If an neglected plant in your collection is already showing signs of distress, taking steps to clean leaves is a critical initial effort to revive a dying houseplant and kickstart its recovery.
If you prefer low-maintenance greenery, selecting hardy low-water plants can make your overall care routine far easier, though even resilient species still need occasional dusting to stay healthy. Furthermore, if you maintain fresh indoor culinary crops like herbs to grow on your kitchen windowsill, keeping their growth clean leaves them healthy, flavorful, and ready for kitchen harvest.
| Plant Category | Best Method to Clean Leaves | Recommended Frequency | Pro Care Tip |
|---|---|---|---|
| Broad-Leafed (Monstera, Ficus) | Damp microfiber cloth | Every 2 weeks | Support the leaf underside to prevent petiole snapping. |
| Fuzzy-Leafed (African Violet) | Dry soft cosmetic brush | Monthly | Avoid water contact; wet trichomes encourage rot spots. |
| Trailing/Small-Leafed (Pothos, Ivy) | Gentle lukewarm shower | Every 4-6 weeks | Allow pot to drain completely in the basin. |
| Cacti & Succulents | Compressed air or soft brush | Every 2 months | Do not wipe away natural epicuticular wax (farina). |
Essential Tools and Supplies to Clean Leaves Efficiently
Equipping yourself with a dedicated plant maintenance kit makes leaf care fast, enjoyable, and safe. Having the right tools on hand ensures you never damage sensitive tissue when you set out to clean leaves across your home.
- Microfiber Cloths: Microfiber is far superior to standard paper towels or rough terry cloth. Its soft synthetic fibers trap tiny dust particles without scratching glossy surfaces or leaving lint bits behind.
- Soft Paintbrushes or Makeup Brushes: Ideal for fine detail work on cacti, succulents, fuzzy leaves, or tight crevices near stem nodes where dust collects.
- Precision Spray Bottles: A quality fine-mist sprayer allows you to apply lukewarm water or mild castile soap solutions evenly without drenching your soil.
- Neem Oil or Insecticidal Soap: Keeping horticultural soap or cold-pressed neem oil nearby allows you to treat emerging pest problems instantly whenever you clean leaves and discover early infestations.
- Nitrile or Cotton Gloves: Wearing clean gloves allows you to gently slide your fingers along delicate vine leaves, removing dust quickly without transferring oils from your skin.
Common Mistakes to Avoid When You Clean Leaves
While leaf maintenance is highly beneficial, doing it incorrectly can cause physical tearing, introduce pathogens, or cause environmental stress. Avoid these common mistakes whenever you clean leaves in your indoor garden:
- Using Commercial Gloss Sprays: Commercial leaf shines contain heavy oils, waxes, or petroleum products that create an artificial coat. While they make foliage glossy instantly, they plug stomata, attract dust like a magnet, and can burn tissue under bright lights. Plain water is always safer when you clean leaves.
- Using Ice-Cold Water: Water chilled straight from the tap shocks sensitive roots and tissues. Cold contact causes leaf spot diseases, particularly in sensitive cultivars like Calatheas, Marantas, and African Violets. Always use warm or room-temperature liquid.
- Placing Wet Plants in Direct Sun: Water droplets lingering on foliage act like tiny magnifying lenses under direct sunlight, concentrating light rays and scorching underlying tissue. Always let plants dry in a shaded, well-ventilated spot before placing them back in sunny windows.
- Applying Too Much Force: Vigorous rubbing tears delicate margins, strips natural protective waxes, or snaps fragile stems. Always hold the leaf support hand firmly beneath the tissue and use gentle, sweeping strokes.
- Forgetting Undersides and Stems: Dust settles primarily on top surfaces, but harmful pests like spider mites and scale insects congregate underneath. Make it a habit to inspect and clean leaves on both sides during every session.
The Myth of Household “Shine” Remedies
Over the decades, various DIY leaf shine hacks have circulated among home gardeners. Popular internet recommendations advise wiping foliage with milk, mayonnaise, coconut oil, olive oil, or banana peels. While these concoctions temporarily create high shine, horticulturists strongly advise against them when you clean leaves.
Mayonnaise, milk, and cooking oils leave behind a thick, sticky organic film. This greasy residue seals off gas exchange through stomata and traps airborne dust at twice the normal rate. Furthermore, organic food substances decompose on plant surfaces, generating unpleasant odors and creating an ideal breeding environment for molds, bacterial spots, and pests like fungus gnats or ants. Banana peels leave behind sugary traces that invite insect activity. For long-term health and safety, plain water and a microfiber rag remain the gold standard when you clean leaves.
How Clean Leaves Support Overall Indoor Plant Wellness
Keeping plant foliage dust-free provides benefits that go far beyond surface aesthetics. When you clean leaves regularly, you optimize the micro-environment surrounding your indoor plants, supporting healthier growth cycles and easier routine maintenance.
First, dust-free foliage maximizes transpiring power, helping the plant pull water up from the roots efficiently. This balanced water movement prevents localized soil oversaturation, reducing the risk of root rot. Second, clean leaves reflect natural light evenly, giving your home garden a rich, vibrant appearance that elevates your interior decor without needing artificial polish.
Furthermore, taking time to clean leaves creates a soothing mindfulness routine for plant owners. Spending quiet moments caring for each plant helps you notice subtle environmental shifts—such as soil moisture levels, light shifts, or potting needs—before small issues grow into serious plant health problems.
Seasonal Adjustments: Keeping Foliage Dust-Free Year-Round
Your cleaning strategy should evolve naturally with changing seasonal conditions inside your home. Adjusting your routine ensures your greenery stays stress-free throughout the entire year.
Spring and Summer Strategy: During active growth months, open windows and running fans introduce higher amounts of outdoor pollen and dust. Clean leaves every two weeks to keep up with rapid growth and maximize energy production. This is also the ideal season to shower plants thoroughly, as warm temperatures help foliage dry quickly without lingering moisture risks.
Autumn and Winter Strategy: When indoor heating systems turn on, dry forced air circulates household dust rapidly. However, cooler indoor temperatures slow down soil evaporation. When you clean leaves during winter, use damp wiping or soft brushing rather than heavy soaking to keep soil from staying overly wet in low light.
Post-Cleaning Care and Long-Term Dust Prevention
Once you finish cleaning your plant collection, taking a few extra preventive steps will keep foliage looking pristine for longer periods and simplify future upkeep:
- Boost Relative Humidity: Ambient humidity helps airborne dust settle onto floors rather than lingering in air currents. Running a humidifier or grouping plants together creates a humid microclimate that reduces dust buildup on foliage.
- Maintain Home HVAC Filters: Replacing furnace and air conditioner filters on schedule significantly lowers airborne dust and pet dander circulating through your living space.
- Optimize Plant Placement: Avoid placing delicate foliage directly beside drafty entryway doors, high-traffic hallways, or forced-air heating vents where dusty air currents are constant.
- Establish a regular routine: Rather than waiting for dust to build into a thick layer, wipe down a few plants each week during your normal watering schedule. Breaking the task into small steps keeps your indoor jungle looking consistently vibrant.
When you regularly clean leaves across your houseplant collection, you promote faster growth, eliminate hidden pest threats, and unlock the natural beauty of your greenery. Your plants will reward your care with lush new foliage, vibrant color, and long-lasting indoor health.