Bringing nature indoors brings vibrant energy to any living space. If you want to transform your home with stunning greenery, learning how to cultivate bromeliads, tropical flowers, and exotic houseplants can completely elevate your space. These resilient specimens offer rich textures, brilliant hues, and captivating forms that require surprisingly simple care. Many enthusiasts find that once they understand the unique biology of these plants, they become the centerpiece of their indoor collection.
Understanding the Botany of Bromeliads
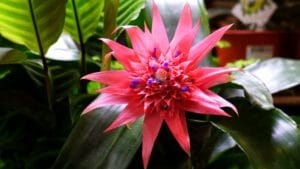
Bromeliads belong to a fascinating family of tropical plants adapted to diverse environments across the Americas. Whether perched on tree branches as epiphytes or rooted in forest floors, they possess unique anatomical traits. By mimicking their natural habitats, indoor gardeners can enjoy lush foliage and long-lasting inflorescences year-round. Mastering bromeliad care indoor spaces is easier than it looks when you know their core survival secrets.
Most varieties found in nurseries are epiphytic, meaning they grow on other plants rather than in soil. In the wild, they use their roots primarily for stability, clinging to bark or stones. They absorb most of their moisture and nutrients through their leaves and a central reservoir. Understanding these differences is the first step toward becoming a successful indoor gardener, similar to mastering general indoor houseplants care protocols.

There are thousands of species, but the most common for indoor shelves include Guzmania, Neoregelia, and Aechmea. Each genus has slightly different requirements, but they all share a love for consistent environments. Here are the 7 essential secrets to keeping your indoor bromeliads thriving.
Secret 1: Master the Bromeliad Care Indoor Tank Watering Method
Unlike typical indoor foliage, many bromeliads draw moisture directly through their central leaf cup rather than their root systems. This cup, or tank, is the heart of the plant. Fill this central reservoir with clean, filtered water or collected rainwater to keep the plant properly hydrated.
Tap water can sometimes contain high levels of minerals or chlorine, which may cause salt buildup on the leaves. If you must use tap water, let it sit out overnight to allow chemicals to dissipate. This small step can prevent the unsightly white crust often seen on older plants.
Flush out the tank every few weeks to prevent stale water accumulation, mineral buildup, or unpleasant odors. Emptying old water prevents bacterial growth and keeps the foliage looking crisp and healthy. Simply tip the plant over or use a turkey baster to remove the old liquid before refilling.
Keep the surrounding soil slightly moist but never saturated. Overwatering the potting substrate can quickly lead to root rot, which remains the primary cause of plant failure. Think of the roots as anchors rather than straws; they do not need to sit in soggy medium.
Secret 2: Provide Bright, Indirect Indoor Light
Light quality directly affects foliage color and flowering potential across all varieties. Most species thrive best under strong, filtered sunlight near an east or west-facing window. This mimics the dappled light they would receive through a tropical forest canopy.
Direct, intense afternoon sun can scorch fragile leaves, causing unsightly brown spots or bleached patches. If your shelf is in a south-facing window, use a sheer curtain to diffuse the rays. Conversely, insufficient light leads to dull foliage color and slow growth.
If you are growing these plants on lower shelves where natural light is limited, consider supplemental LED grow lights. Modern full-spectrum LEDs are highly effective and can be easily mounted to the underside of shelves. This ensures your plants receive the 12 to 14 hours of light they need to stay vibrant.
Secret 3: Optimize Humidity for Bromeliad Care Indoor Environments
Coming from tropical regions, these plants crave a humid environment. Most modern homes have dry air, especially during winter months when heating systems are active. Aim for a humidity level between 40% and 60% to keep the leaf tips from browning.
You can increase local humidity by grouping plants together. As they transpire, they create a microclimate of moisture. Alternatively, place the pots on a tray filled with pebbles and water. Ensure the bottom of the pot stays above the water line to avoid rot.
Air circulation is equally important. In their natural habitat, they are exposed to constant breezes. Stagnant air can lead to fungal issues or pest infestations. A small, low-speed fan in the room can provide the necessary air movement without creating a harsh draft.
Secret 4: Use the Right Soil-Free Potting Substrate
Standard potting soil is often too dense for bromeliads. Because many are epiphytic, they require a medium that drains rapidly and allows air to reach the roots. A mix of orchid bark, perlite, and peat moss is usually ideal.
Some growers prefer using a dedicated bromeliad mix, which often includes charcoal and coco coir. The goal is to provide a structure that holds a small amount of moisture while allowing excess water to flow through immediately. If the medium smells musty, it is likely holding too much water.
When repotting, choose a container that is just large enough to hold the root mass. These plants generally have small root systems and do not require massive pots. Using a pot that is too large can lead to excess moisture retention in the unused substrate. For more on substrate selections, view our guide on well-draining soil mixes.
Secret 5: Feed Sparingly with Foliar Fertilizer
Bromeliads are not heavy feeders. In the wild, they survive on the small amount of organic matter that falls into their central cups. Over-fertilizing can actually harm the plant, leading to leggy growth or a loss of color intensity.

Use a balanced, water-soluble fertilizer diluted to one-quarter or half strength. During the growing season (spring and summer), you can apply this liquid to the soil or mist it onto the leaves. Avoid putting concentrated fertilizer directly into the central tank, as this can burn the tender center.
Slow-release pellets can also be used sparingly in the soil. However, many experts suggest that foliar feeding is the most effective method. For more detailed scientific guidelines on plant nutrition, you can visit the University of Florida IFAS Extension for professional horticultural advice.
Secret 6: Propagate Offsets (Pups) for Endless Plants
One of the most rewarding aspects of growing these plants is their natural lifecycle. After a bromeliad blooms, the mother plant will eventually begin to decline. However, before it dies, it will produce small clones at its base known as “pups” or offsets.
Wait until the pup is at least one-third to one-half the size of the mother plant before removing it. This ensures the young plant has developed enough of its own root system to survive independently. Use a sharp, sterilized knife to cut the pup away from the parent plant.
Once removed, pot the pup in a fresh, well-draining mix. Keep it in a slightly more humid environment for the first few weeks to help it establish. Within a year or two, these pups will grow into full-sized adults and eventually produce their own stunning flowers.
Secret 7: Encourage Reblooming with Ethylene Gas
While the foliage is beautiful, the bloom is the main attraction. If your plant is mature but refuses to flower, you can sometimes trigger the process using ethylene gas. This is a natural ripening agent produced by certain fruits.
Place the plant inside a large, clear plastic bag with a ripe apple or banana. Seal the bag and leave it in a shaded spot for two to three days. The ethylene gas released by the fruit will signal the plant to begin the flowering process.
After removing the bag, return the plant to its usual bright spot. You should see an inflorescence begin to form within six to fourteen weeks. Note that this trick only works on mature plants that have reached their full size.
Styling Bromeliads on Indoor Shelves
Indoor shelves offer a unique opportunity to showcase the architectural beauty of these plants. Because they come in various heights and colors, you can create a tiered effect. Place taller species like Aechmea fasciata at the back and smaller Neoregelia varieties at the front.
Consider the color of your shelving. Dark wood or black metal shelves make the neon pinks and oranges of the bracts pop. White shelves create a clean, modern look that emphasizes the geometric patterns of the foliage. Grouping them by color gradients can also transform a simple bookshelf into a vibrant tropical statement piece.
Conclusion: Mastering Bromeliad Care Indoor Spaces
By understanding their unique watering, lighting, and humidity needs, you can easily maintain healthy bromeliads inside your home. These low-maintenance yet striking plants provide long-lasting color that few other indoor species can match. Start implementing these seven secrets today to watch your indoor jungle thrive.