Tropical houseplants bring unmatched vibrant life into modern interiors, but dry indoor air frequently stresses delicate foliage. We at CoveMOOD recommend implementing simple ambient moisture solutions, such as a pebble tray, to recreate natural jungle microclimates without the need for expensive or noisy electronic humidifiers. By understanding the relationship between evaporation and plant health, you can transform a struggling indoor garden into a lush, thriving sanctuary.
- Why Humidity Matters for Tropical Foliage
- The Science Behind the Pebble Tray
- Essential Materials for Your Pebble Tray
- Choosing the Right Stones for Evaporation
- Step-by-Step: Building Your First Tray
- 7 Brilliant DIY Hacks for Perfect Humidity
- Seasonal Adjustments for Maximum Efficiency
- Maintenance and Cleaning Your Pebble Tray
- Best Plants for Humidity Trays
- Common Pebble Tray Mistakes to Avoid
- Pebble Tray vs. Other Humidity Methods
Why Humidity Matters for Tropical Foliage
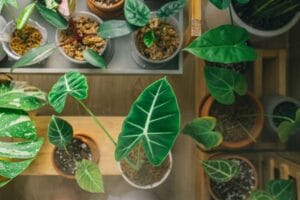
Most tropical plants are native to environments where the relative humidity rarely drops below 60% and often hovers near 90%. In contrast, the average modern home, especially during winter when heating systems are active, may have humidity levels as low as 10% to 20%. This discrepancy leads to rapid transpiration, where the plant loses moisture through its leaves faster than the roots can absorb it.
When ambient moisture levels drop below the 50 percent threshold, exotic species like Ferns, Calatheas, and Alocasias suffer from visible distress. You might notice brown crispy leaf tips, leaf curl, and stunted growth. If your plant is already showing signs of severe stress, you may need to revive a dying houseplant using more intensive recovery methods before establishing a long-term humidity solution. Maintaining a consistent moisture level is the best preventative care for these sensitive species.
The Science Behind the Pebble Tray
The concept is rooted in the simple principle of evaporation. As water sits in a shallow reservoir, it naturally turns into water vapor. By placing pebbles in the water, you increase the surface area available for evaporation and, more importantly, provide a stable platform for your plant pot to sit above the water line. This creates a localized “microclimate” of humid air directly surrounding the foliage. The effectiveness of the pebble tray relies on the fact that humid air is slightly lighter than dry air, allowing it to rise directly into the canopy of the plant.
According to the University of Minnesota Extension, most tropical plants require a relative humidity of at least 40% to 50% to thrive indoors. A well-constructed tray can effectively raise the humidity in the immediate vicinity of the plant by 5% to 10%, which is often the difference between a plant that merely survives and one that flourishes. For more specific guidance on diverse species, the Missouri Botanical Garden provides extensive resources on managing indoor environmental stressors.
Essential Materials for Your Pebble Tray
Creating a custom moisture reservoir takes only a few minutes. You likely already have most of these components for your pebble tray in your home or garden shed:
- A Waterproof Tray: This can be a traditional plastic plant saucer, a decorative ceramic dish, or even an upcycled baking sheet. It should be at least 2 inches deep to hold enough water for several days of evaporation.
- Pebbles or Stones: River rocks, pea gravel, decorative glass gems, or expanded clay pebbles (LECA) all work well.
- Distilled or Filtered Water: While tap water works, distilled water prevents mineral buildup and “white crust” on your stones.
- Activated Charcoal: This is an optional but highly recommended addition to keep the water fresh and prevent odors.
Choosing the Right Stones for Evaporation
The type of stone you select can impact the functionality of the pebble tray significantly. Smooth river rocks are aesthetically pleasing and easy to clean, but they have less surface area than porous stones. If you are looking for maximum humidity, consider using lava rocks or LECA (Lightweight Expanded Clay Aggregate). These porous materials wick water into their internal structures, essentially increasing the “wet” surface area exposed to the air, which accelerates the evaporation process. Decorative glass gems are a great choice for modern interiors, though they require more frequent cleaning to maintain their sparkle.
Step-by-Step: Building Your First Tray
Follow these steps to ensure your setup is both functional and safe for your plants:
- Clean the Tray: Ensure your chosen container is free of dust and debris. If you are upcycling a container, give it a quick scrub with a mild soap solution to remove any residues that might encourage mold.
- Layer the Pebbles: Fill the base of your pebble tray with a 1-to-2-inch layer of pebbles. Ensure the layer is level so your plant pot won’t tip over or lean, which could cause uneven watering.
- Add Water: Pour water into the tray until it reaches just below the top of the pebbles. Crucial Rule: The water level must never touch the bottom of the plant pot. If the pot sits in water, the soil will wick up the moisture, leading to root rot.
- Position the Plant: Place your potted plant directly on top of the pebbles. As the water evaporates, it will rise through the leaves, providing the constant humidity tropicals crave.
7 Brilliant DIY Hacks for Perfect Humidity
1. The “Invisible” Cachepot Hack
If you dislike the look of a traditional pebble tray sitting under your pot, find a decorative cachepot (a pot without a drainage hole) that is significantly wider than your plant’s nursery pot. Fill the bottom of the cachepot with pebbles and water, then set the nursery pot inside. This hides the humidity system while providing the same benefits, creating a sleek, professional look for your plant shelf.
2. The Communal Oasis
Plants naturally release moisture through a process called transpiration. By grouping several plants together on one large pebble tray (like a boot tray or a large galvanized metal tray), you create a massive humidity zone. The collective evaporation from the tray and the plants themselves creates a much more stable environment than a single tray could provide.
3. The LECA Advantage
Instead of heavy river stones, use Lightweight Expanded Clay Aggregates (LECA). These porous clay balls have a massive surface area and actually wick water upward, increasing the evaporation rate significantly compared to smooth stones. They are also much lighter, making it easier to move large trays for cleaning.
4. The Charcoal Freshness Filter
Standing water can sometimes develop a swampy smell or attract pests. Sprinkle a thin layer of horticultural charcoal at the bottom of your tray before adding pebbles. The charcoal acts as a natural filter, keeping the water clear and odor-free for longer periods.
5. The Upcycled Vintage Aesthetic
Don’t limit yourself to plastic saucers. Use vintage silver platters, copper baking sheets, or even shallow wooden crates lined with plastic. These can turn the aesthetic of a pebble tray into a centerpiece of your interior design, blending functionality with high-end decor.
6. The Moss Topper Technique
For an extra boost, place a thin layer of preserved or live sphagnum moss over the surface of the pebble tray stones. The moss holds onto moisture and releases it slowly, while also hiding the stones for a more natural, “forest floor” appearance. This is particularly effective for high-humidity lovers like Maidenhair ferns.
7. The Tiered Humidity Station
If you have limited space, use a tiered cupcake stand or a multi-level cooling rack placed over a large water reservoir. This allows you to stack smaller plants vertically while they all benefit from the rising water vapor. It’s an architectural way to maximize the humidity in a small footprint.
Seasonal Adjustments for Maximum Efficiency
The efficiency of your pebble tray throughout the year will fluctuate based on your home’s climate control. During the winter, indoor heating strips moisture from the air, causing water in your tray to evaporate much faster. You may need to refill the reservoir every two days during the coldest months. Conversely, in the summer, if you run an air conditioner, the air can become surprisingly dry. Monitor the water levels closely during these seasonal shifts to ensure your plants never experience a sudden drop in ambient moisture.
Maintenance and Cleaning Your Pebble Tray
To keep your humidity system effective, you must perform regular maintenance. Over time, water will evaporate, leaving behind mineral deposits and dust. Once a month, remove the pebbles and wash them in a colander with warm water and a splash of white vinegar. This kills any lingering algae or bacteria and removes the white “crust” caused by hard water.
Always keep the water topped up. If you notice mosquito larvae (tiny wiggling organisms) in the water, empty the tray immediately and clean it thoroughly. Using a drop of mosquito bits or a tiny amount of dish soap can also prevent pests from breeding. If you live in an area with very hard water, using distilled or rain water will significantly reduce the amount of scrubbing required during your monthly deep clean.
Best Plants for Humidity Trays
While almost all indoor plants appreciate a boost in moisture, some species benefit most from a pebble tray setup:
- Calatheas and Marantas: Known as “Prayer Plants,” these are notorious for getting brown edges if the air is too dry.
- Ferns: Especially Boston Ferns and Maidenhair Ferns, which have thin leaves that dry out in hours.
- Orchids: Epiphytic orchids love the humid air rising around their aerial roots, mimicking their natural canopy environment.
- Peace Lilies: These will droop less frequently if provided with a consistent humidity source.
- Fittonia (Nerve Plants): These plants will literally faint if the humidity drops too low; a tray keeps them upright and vibrant.
Common Pebble Tray Mistakes to Avoid
The most common mistake is overfilling the pebble tray. If the bottom of the pot is submerged, the soil stays perpetually wet, cutting off oxygen to the roots and inviting fungal pathogens like Pythium. Another mistake is placing the tray directly over a heating vent. While the heat increases evaporation, the hot air blowing directly on the plant can negate the benefits and scorch the leaves. Always ensure there is a few inches of space between the tray and any active heat source to prevent heat stress.
Pebble Tray vs. Other Humidity Methods
Many gardeners wonder if misting is better than a tray. Misting only raises humidity for a few minutes and can actually spread leaf spot diseases if the water sits on the foliage too long. Electronic humidifiers are powerful but require electricity, regular filter changes, and can be noisy. The pebble tray vs. humidifier debate often comes down to scale; while a humidifier covers a whole room, the tray method is a “set it and forget it” solution that provides targeted, 24/7 moisture without any mechanical parts or energy costs.
In conclusion, mastering the use of a pebble tray is a fundamental skill for any indoor gardener looking to expand their collection of tropical foliage. It is an affordable, aesthetic, and highly effective way to bridge the gap between your home’s dry air and the lush, humid jungles where these plants originated. By following these hacks and maintenance tips, you ensure your green companions remain vibrant and healthy for years to come.